Few homeowners think about what lies inside their walls until a renovation, repair, or unexpected leak forces the issue. Once drywall comes down, decades of wiring, pipes, insulation, and ductwork are suddenly on display, often telling a story very different from what the home’s polished exterior suggests. Understanding what these hidden systems reveal can help you plan smarter repairs, budget for upgrades, and avoid costly surprises down the road. This guide walks through the most common discoveries behind old walls and what they mean for your home’s safety and efficiency.
Outdated Electrical Wiring and Panel Capacity
When walls open up in homes built before the 1980s, it is common to find knob-and-tube wiring or aluminum wiring that no longer meets modern safety codes. These older systems were not designed to handle the electrical load of today’s appliances, computers, and HVAC equipment, which means they can overheat or trip breakers frequently. A licensed electrician should evaluate any exposed wiring before walls are closed back up, since patching over a hazard only delays an expensive fix.
- Look for cloth-insulated wires, which indicate wiring older than 50 years
- Check whether the electrical panel has enough amperage for modern usage, typically 100 to 200 amps
- Note any scorch marks or melted insulation near outlets or junction boxes
- Ask whether aluminum wiring connections have been properly treated to prevent corrosion
Aging Pipes and Hidden Plumbing Damage

Behind bathroom and kitchen walls, it is common to uncover galvanized steel or polybutylene pipes that are decades past their expected lifespan. Galvanized pipe typically lasts 40 to 50 years before corrosion compromises it, while polybutylene, widely installed from the 1970s through the 1990s, has a history of failing even sooner due to its reaction with chlorine in treated water. These materials corrode from the inside out, restricting water flow and sometimes leading to pinhole leaks that cause slow, unnoticed water damage. The signs are not always obvious until a wall comes open. Rust-colored water stains, a buildup of mineral scale around joints, or flaking white and orange residue on pipe exteriors all point to advancing corrosion. Reduced water pressure throughout the house is another clue, since narrowing pipe interiors choke off flow long before a visible leak ever appears. If your renovation reveals rusty, discolored, or mineral-crusted pipes, it is worth having plumbers inspect the full system rather than just replacing the visible section. A single exposed pipe segment rarely tells the whole story, since the rest of the system installed at the same time is likely aging at the same rate. Plumbers can also check for incompatible connections, such as newer copper joined directly to old galvanized steel, which accelerates corrosion through a process called galvanic reaction. Catching these issues during a wall-opening project is far cheaper than discovering them later through a burst pipe or a mold-damaged subfloor.
Many homeowners are surprised to learn that a single leak behind a wall can indicate a larger network of aging plumbing throughout the house. Pipes installed at the same time tend to fail around the same time, since they’ve endured identical water pressure, mineral content, and years of wear. Replacing one section without addressing the rest often means repeating the same repair within a few years, costing far more in cumulative labor and drywall repairs than a single coordinated fix. A thorough inspection can also reveal whether the home still has outdated pipe materials that are no longer sold due to their failure rates. Galvanized steel, common in homes built before the 1960s, corrodes from the inside out and can reduce water pressure long before it actually leaks. Polybutylene piping, widely used in the 1970s and 80s, is prone to sudden cracking and is considered a red flag by many insurers and home inspectors. Beyond material type, contractors look for telltale signs of broader plumbing fatigue: mineral staining, pinhole corrosion, or mismatched pipe fittings from previous patch jobs. Finding one of these clues often justifies a camera inspection of the remaining pipe runs before walls are closed back up. Catching these issues during a renovation, rather than after a burst pipe, can mean the difference between a planned upgrade and an emergency repair involving water damage, mold remediation, and higher costs overall.
- Galvanized steel pipes typically last 40 to 50 years before significant corrosion; homes built before the 1960s are prime candidates for rusted, narrowing pipe walls
- Polybutylene piping, used from the 1970s to 1990s, is prone to unexpected cracking, especially when exposed to chlorinated water over time
- Discoloration in tap water often signals internal pipe corrosion, with rusty-brown tints pointing to iron buildup and blue-green stains hinting at copper pipe deterioration
- Water pressure drops can indicate mineral buildup inside old pipes, particularly in areas with hard water where scale accumulates fastest
- Behind-the-wall leaks may leave telltale warped drywall, bubbling paint, or musty odors long before a visible puddle appears
- Soldered joints from pre-1980s construction may contain lead, which can leach into water as connections age and corrode
- A licensed plumber can run a pressure test or camera inspection to assess pipe condition without fully opening every wall
Ductwork Condition and Airflow Problems
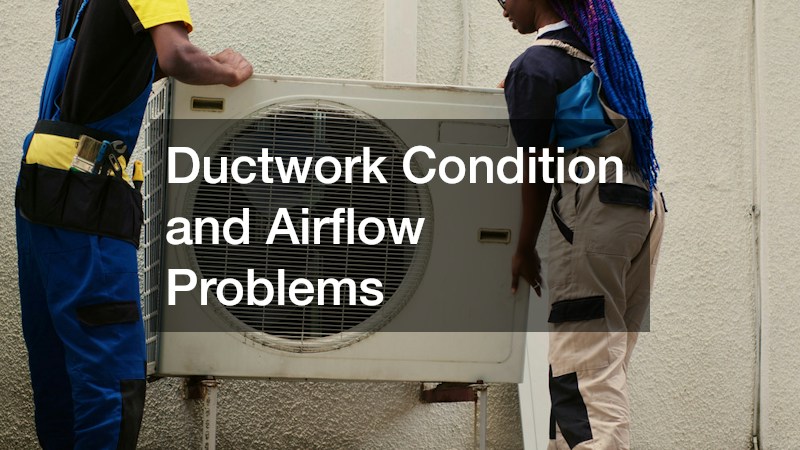
Opening up walls and ceilings often exposes ductwork that has been improperly sealed, crushed, or insulated with materials that no longer meet efficiency standards. Flexible ducts flattened by framing, disconnected joints held together with ordinary cloth tape instead of mastic sealant, and crumbling asbestos-era insulation wraps are all common discoveries. The Department of Energy estimates that a typical home loses around 20-30% of conditioned air through duct leaks, gaps, and poor connections, meaning a sizable chunk of every heating or cooling cycle never actually reaches living spaces. Leaky ducts can waste a significant portion of conditioned air before it ever reaches a room, forcing the system to work harder than necessary. Over time, this added strain shortens the lifespan of furnaces and air conditioning units, which already run on borrowed time in older homes. Homeowners sometimes also find signs of pest activity or moisture damage inside duct cavities, both of which point to gaps that let in more than just air. This is often the moment homeowners realize their energy bills have been inflated for years due to problems they could not see. It’s also an opportunity to upgrade: resealing ducts with mastic, adding proper insulation rated for current code, and resizing undersized runs can meaningfully improve comfort and lower utility costs. Since walls are already open, this is typically the most cost-effective window to address these issues before drywall goes back up.
Once the drywall comes down, ductwork tends to tell on itself. Crushed flex duct, gaps at the joints, and silver duct tape holding sections together are common finds in homes more than a couple of decades old. None of these are cosmetic issues — they represent air leaking into wall cavities instead of reaching your living spaces, which can waste 20 to 30 percent of your system’s output according to typical industry estimates. If your contractor finds disconnected sections or duct tape repairs from a previous owner, it is a good time to call for air conditioning repair before finishing the wall. Rooms that never seem to cool evenly, an outdoor unit that runs constantly, or utility bills that feel disproportionate to your home’s size are all signs worth mentioning to a technician during this phase. Lingering airflow problems can also be an early sign that you will need AC repair sooner than expected once the system is sealed back up. Addressing airflow issues now is far easier and less expensive than cutting into a finished wall again later. A professional assessment can also confirm whether the ductwork is correctly sized for your home’s square footage, since undersized runs force the system to work harder year-round. This is also a reasonable moment to ask about insulation wrap on exposed ducts, especially in attics or crawlspaces where temperature swings are extreme. A little diagnostic work now can spare you a repeat renovation down the road.
- Crushed or kinked ducts reduce airflow by as much as 50 percent, often the result of careless installation or shifting framing over decades
- Disconnected joints allow conditioned air to escape into wall cavities, quietly inflating utility bills while rooms never quite reach the thermostat setting
- Old fiberglass duct insulation may be deteriorating and releasing fibers into the air, a concern worth flagging for anyone with allergies or respiratory sensitivities
- Flexible ducting from past decades may have degraded, sagging between supports and creating low spots where moisture and debris collect
- Poor duct design can cause uneven temperatures between rooms, especially in additions tied into an undersized original system
- Rodents or pests sometimes nest inside exposed ductwork, leaving behind debris that further restricts airflow and compromises indoor air quality
- Sealing visible gaps with mastic or metal tape during a wall opening is a low-cost fix that can meaningfully improve system efficiency
Insulation Gaps and Moisture Retention
Many older homes have minimal or deteriorated insulation, especially in exterior walls where it matters most for temperature control. Over time, insulation can settle, become compressed, or absorb moisture, losing much of its effectiveness. This not only drives up heating and cooling costs but can also create conditions favorable to mold growth inside wall cavities.
- Settled insulation often leaves gaps near the top of wall cavities
- Water stains on insulation indicate a past or ongoing leak
- Compressed insulation loses a significant portion of its R-value over time
- Vapor barriers installed incorrectly can trap moisture rather than block it
Roof Decking and Attic Ventilation Issues
When renovations extend into attic spaces, it is common to discover roof decking that has been compromised by years of poor ventilation or slow leaks. Dark staining, soft spots, or sagging decking boards are signs that moisture has been accumulating for a long time, often without any visible indication from inside the living space. In these cases, consulting roofing companies before closing up the ceiling can prevent a much larger structural repair later.
Attic ventilation problems often go hand in hand with decking damage, since trapped heat and humidity accelerate wood deterioration. A well-ventilated attic helps regulate temperature extremes and extends the life of roofing materials above. Catching these issues during a wall or ceiling renovation gives you a rare opportunity to address them before they become bigger, costlier problems.
- Dark streaking on decking boards usually points to long-term moisture exposure
- Soft or spongy wood indicates rot that needs replacement, not just repair
- Inadequate soffit or ridge venting can trap heat and humidity year-round
- Mold spots on the underside of decking often signal chronic condensation issues
Furnace and Central System Connections
Walls near utility closets or mechanical rooms sometimes reveal outdated ductwork connections, disconnected thermostats wires, or makeshift repairs tied to the furnace and central air system. These patch jobs are often signs that a previous owner tried to avoid a larger repair rather than solve the underlying issue. When this kind of improvisation is uncovered, it is worth having a qualified HVAC Company evaluate the entire system rather than simply reconnecting what was there before.
It is also common to find that the equipment itself is far older than expected, sometimes installed decades before the current homeowner moved in. Older furnaces and air handlers tend to run less efficiently and may not integrate well with modern thermostats or zoned systems. Identifying this during a renovation allows you to make an informed decision about repairing versus replacing outdated equipment.
- Furnaces typically last 15 to 20 years before efficiency drops significantly
- Mismatched ductwork sizes can reduce overall system performance
- Outdated wiring to thermostats may not support smart home upgrades
- Rust or corrosion near the furnace base can indicate a past condensation leak
Structural Framing and Pest Damage
Beyond mechanical systems, opening walls can expose structural issues like water-damaged studs, termite tunnels, or framing that has shifted over time. These problems are often invisible until drywall is removed, which is why many homeowners are caught off guard during what they expected to be a simple cosmetic update. Identifying framing damage early allows for targeted repairs rather than a full structural overhaul later.
- Termite damage often leaves hollow-sounding wood with visible tunneling
- Water-damaged studs may appear discolored or feel soft to the touch
- Shifting framing can cause doors and windows to stick or misalign
- Old nail patterns can reveal previous repairs that were never properly finished
What you find behind your walls can tell you more about your home’s true condition than any surface-level inspection ever could. Rather than feeling discouraged by these discoveries, treat them as a roadmap for prioritizing repairs and upgrades that protect your home’s safety, efficiency, and value. Tackling issues with wiring, plumbing, ductwork, insulation, roofing, and structural framing while the walls are already open can save significant time and money compared to addressing them separately. If your renovation has revealed more than you expected, consulting the right professionals now is the smartest way to move forward with confidence.